Setting up the Plugin is very simple.

It can be used both with personal banners and with Google Adsense ™ or both in the same project.
in Google Adsense ™ Use fixed sizes, don’t use responsive layout, otherwise it won’t work.
1.Create an Adsense Slot and Set the Size

Google Adsense™ suggest sizes, check here: https://support.google.com/adsense/answer/9185043
2.Click on the code generation button

3.Copy the two codes you see inside the code block
ca-pub-xxxxxxxxxxxxxxx
e xxxxxxxxxxxxxx
<script async src="https://pagead2.googlesyndication.com/pagead/js/adsbygoogle.js"></script>
<!-- test_pano -->
<ins class="adsbygoogle"
     style="display:inline-block;width:320px;height:100px"
     data-ad-client="ca-pub-xxxxxxxxxxxxxxx"
     data-ad-slot="xxxxxxxxxxxxxx"></ins>
<script>
     (adsbygoogle = window.adsbygoogle || []).push({});
</script>
4. and paste them into their respective spaces

This way the Adsense ™ banner will be shown in all scenes
The Banner by Google™ will not be displayed on offline projects, you will need to upload them online to see how it works.
Setting up a text
If you also configure the plugin for your personal banners, you can create a label text, like this
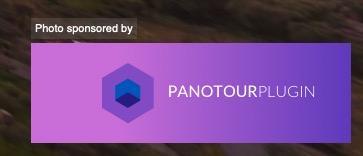
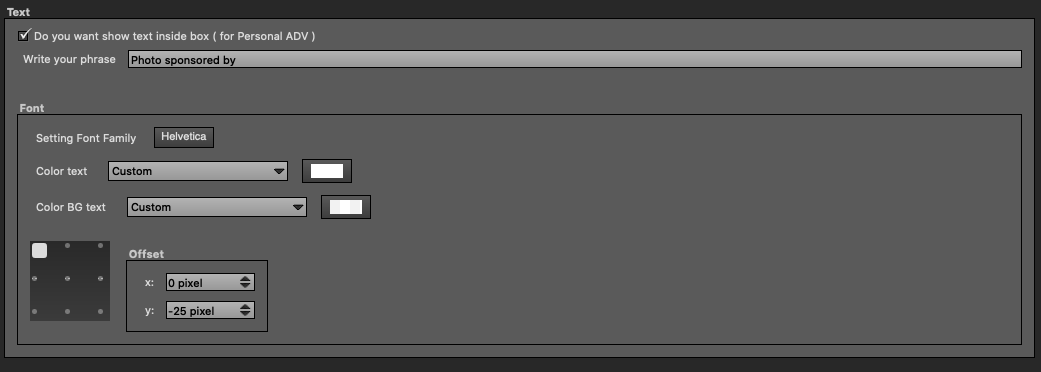
If you leave the field blank you will not see any text
Setting of Personal Banners
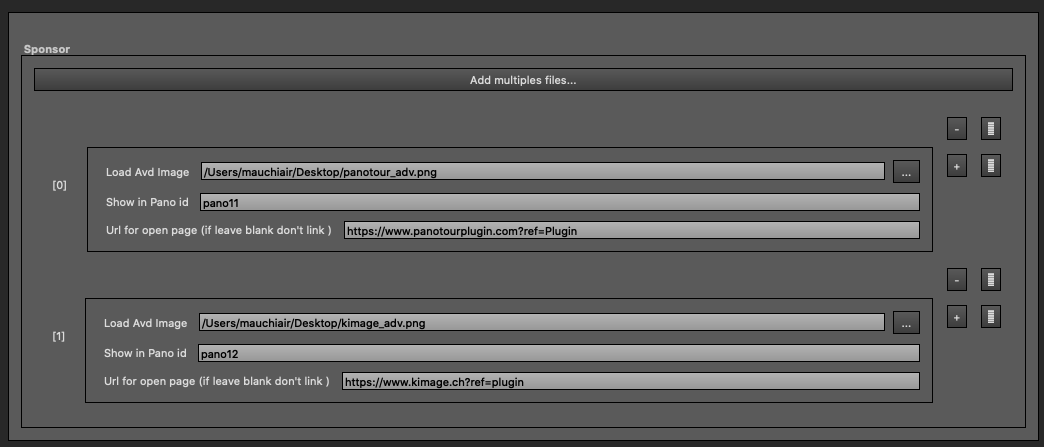
You can set a personal banner for each scene by indicating the scene ID
and upload your file, you will have to make the banners the same size as the window you have previously set.
If you add a link by clicking on the banner, a new window will open with the reference site
By clicking on the “+” you can add a new Scene / Banner
Ricorda di impostare anche il suffisso http:// or https://
In summary, in the banner scenes you will see the banner, in the bannerless scenes you will see the Google ™ one, if you have it set up, otherwise nothing will be displayed.